> For the complete documentation index, see [llms.txt](https://help.spicegems.com/llms.txt). Markdown versions of documentation pages are available by appending `.md` to page URLs; this page is available as [Markdown](https://help.spicegems.com/esl-easy-store-locator/settings/custom-fields.md).
# Custom Fields
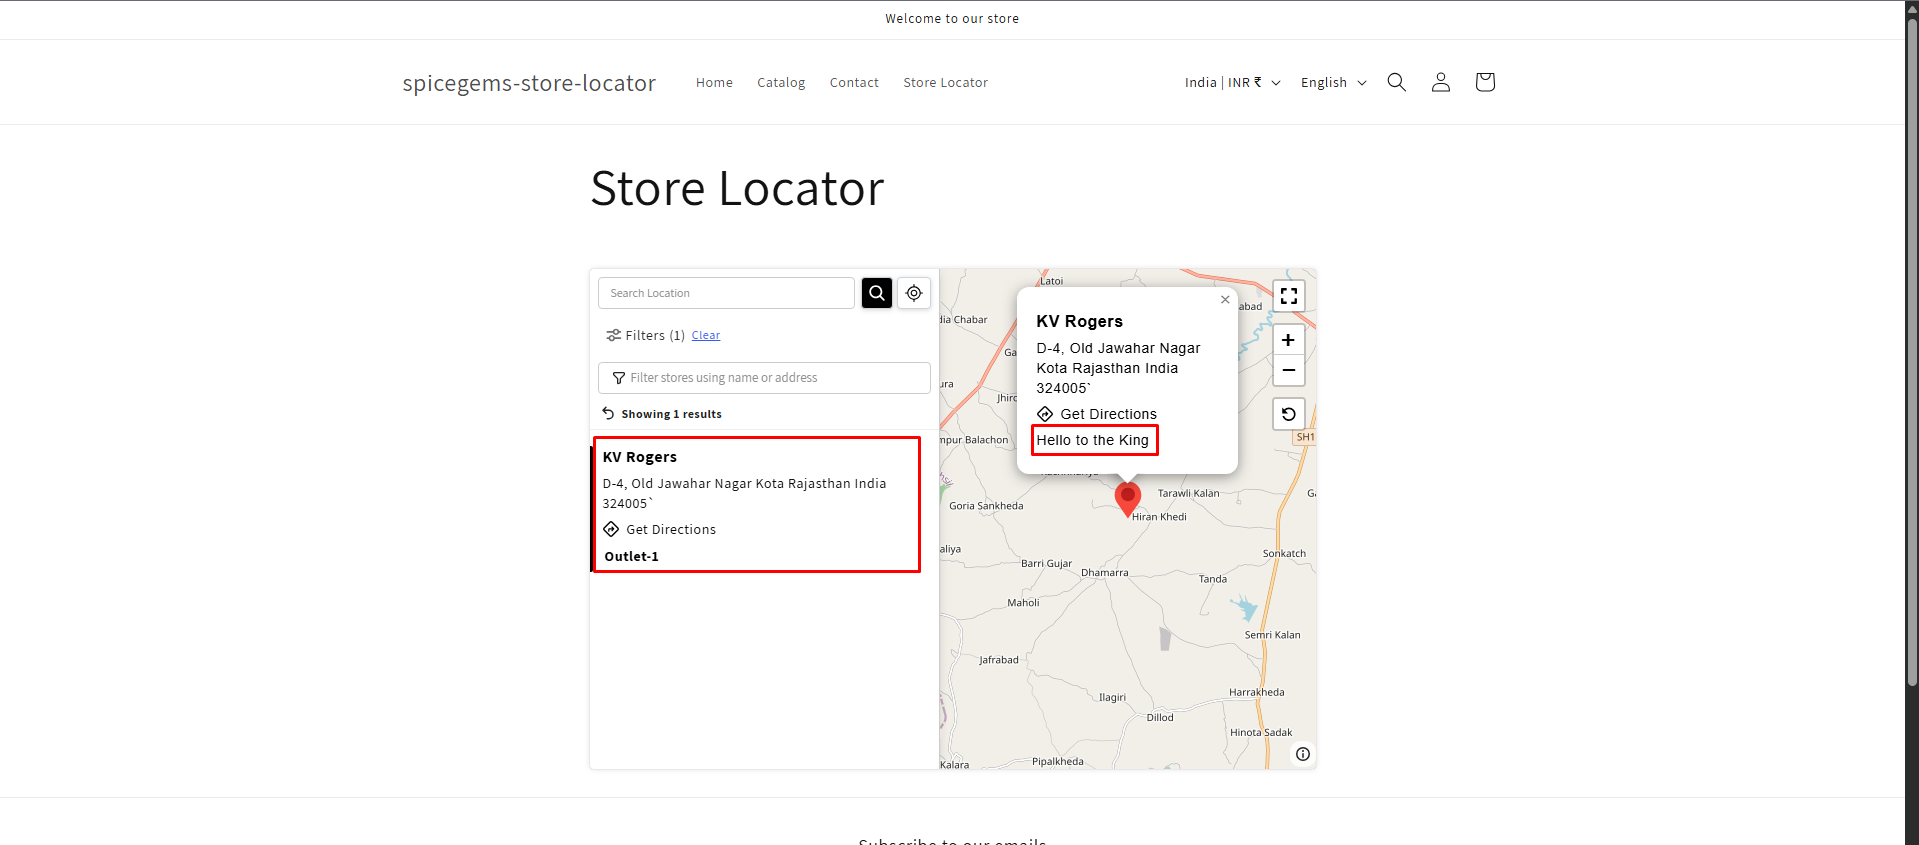
Using this setting, you can add and display additional information to the users on the Map.
To configure the setting, follow the steps below:
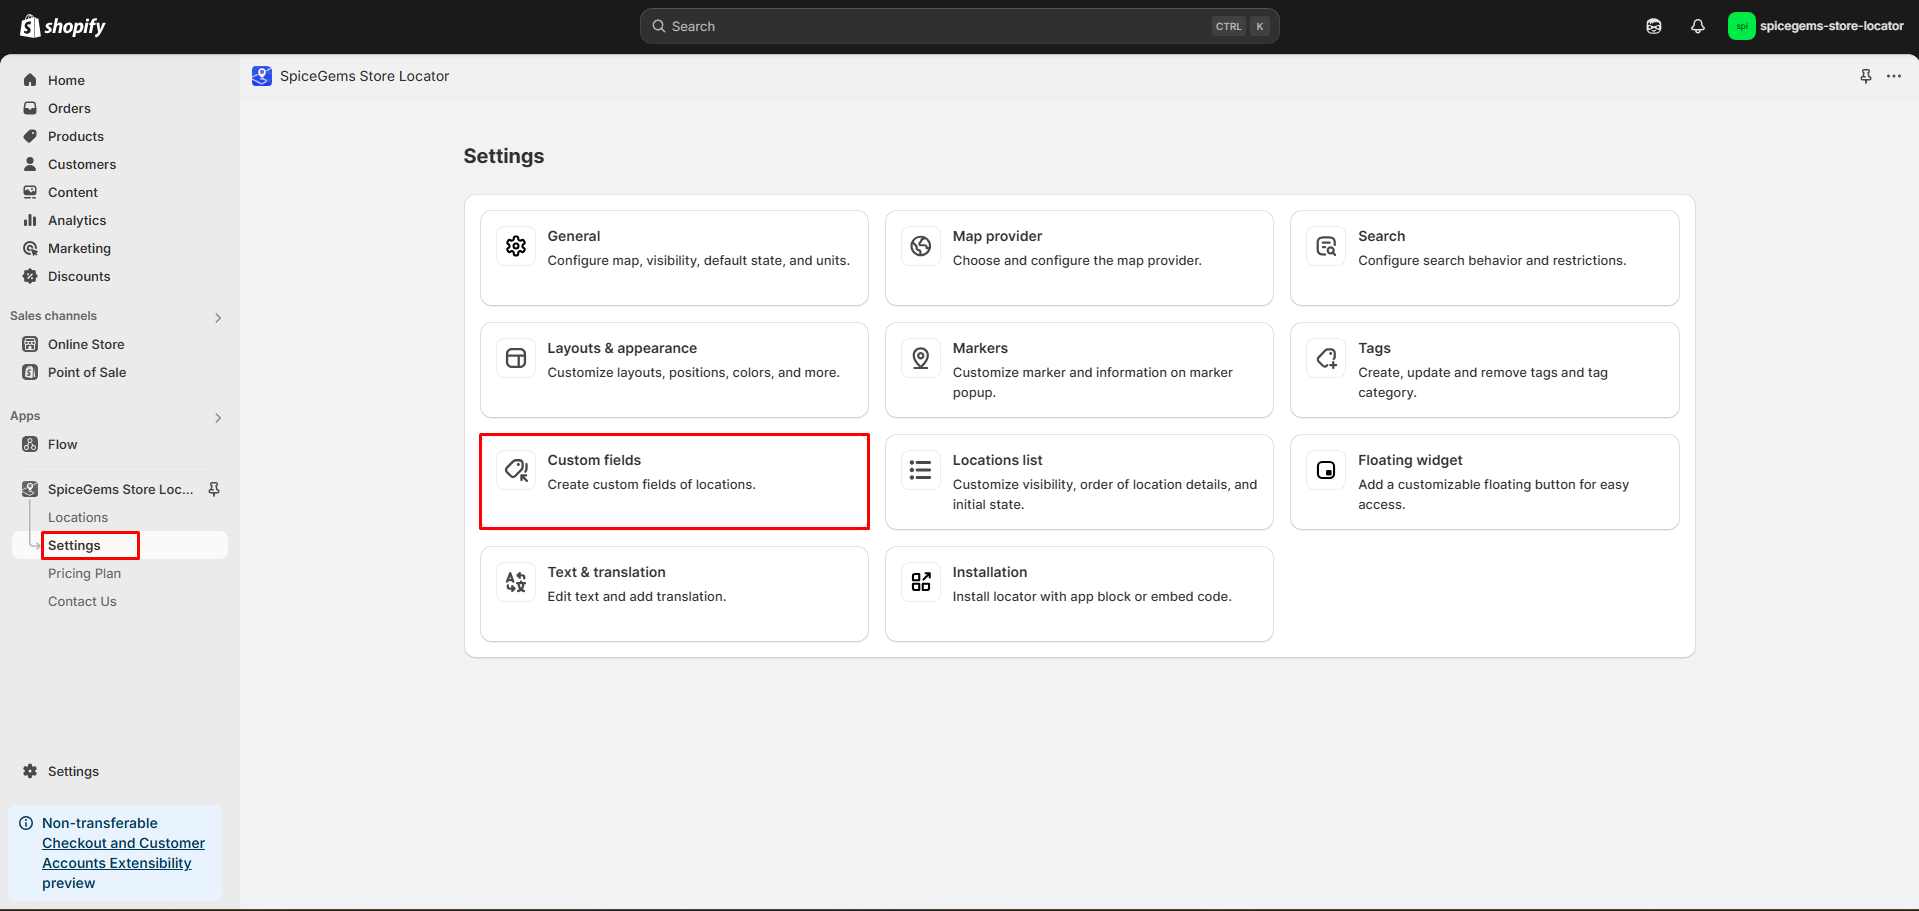
### Step 1: In the Settings → click on Custom Fields
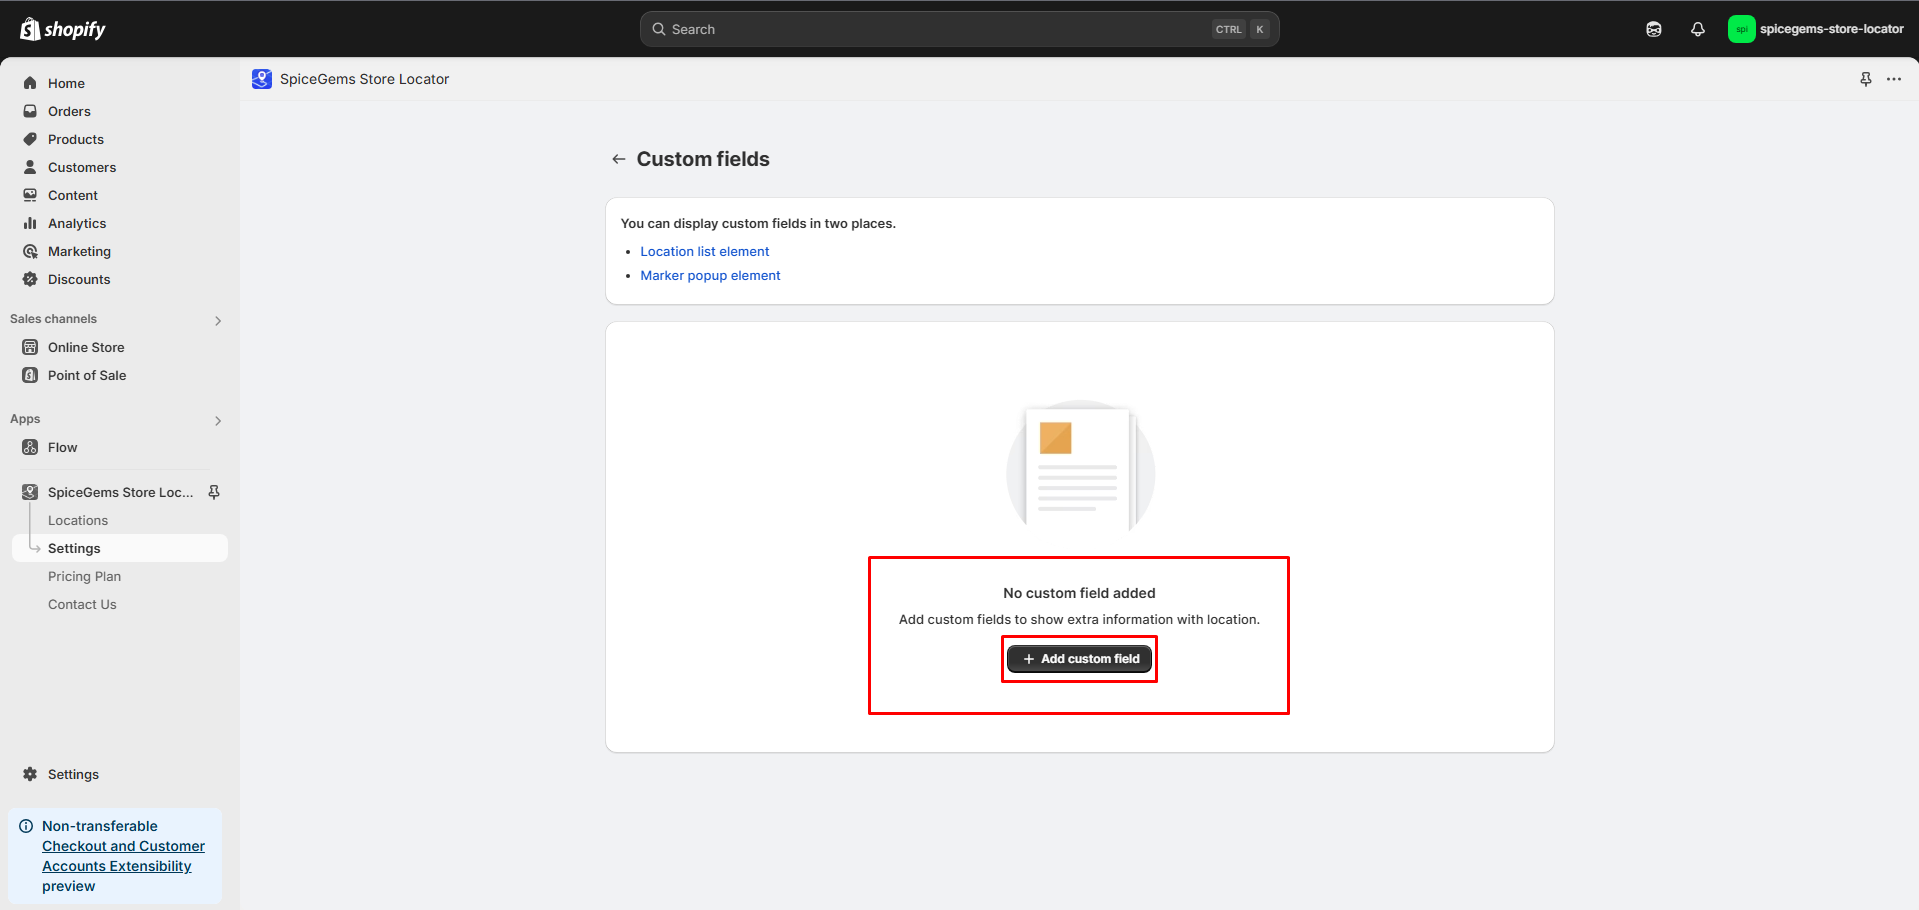
### Step 2: Click on Add Custom Field
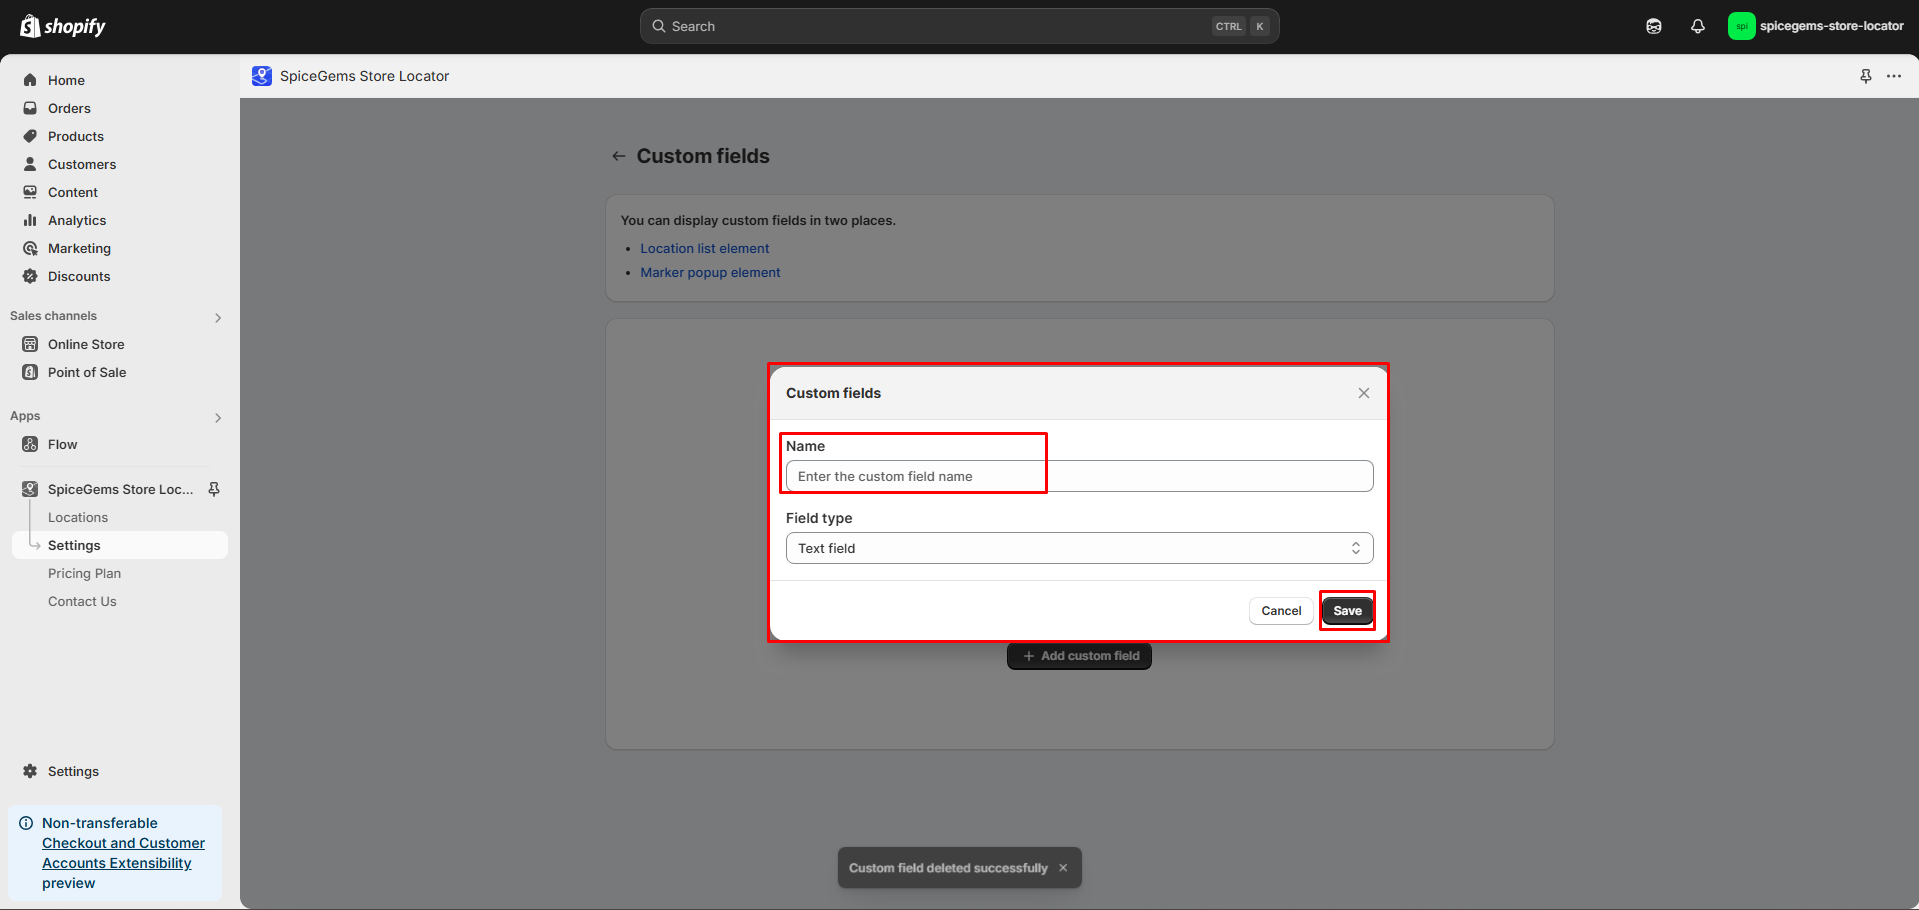
### Step 3: Configure the following fields → click save:
* Name of the Custom Field
* Choose Field Type - Text Field or Button
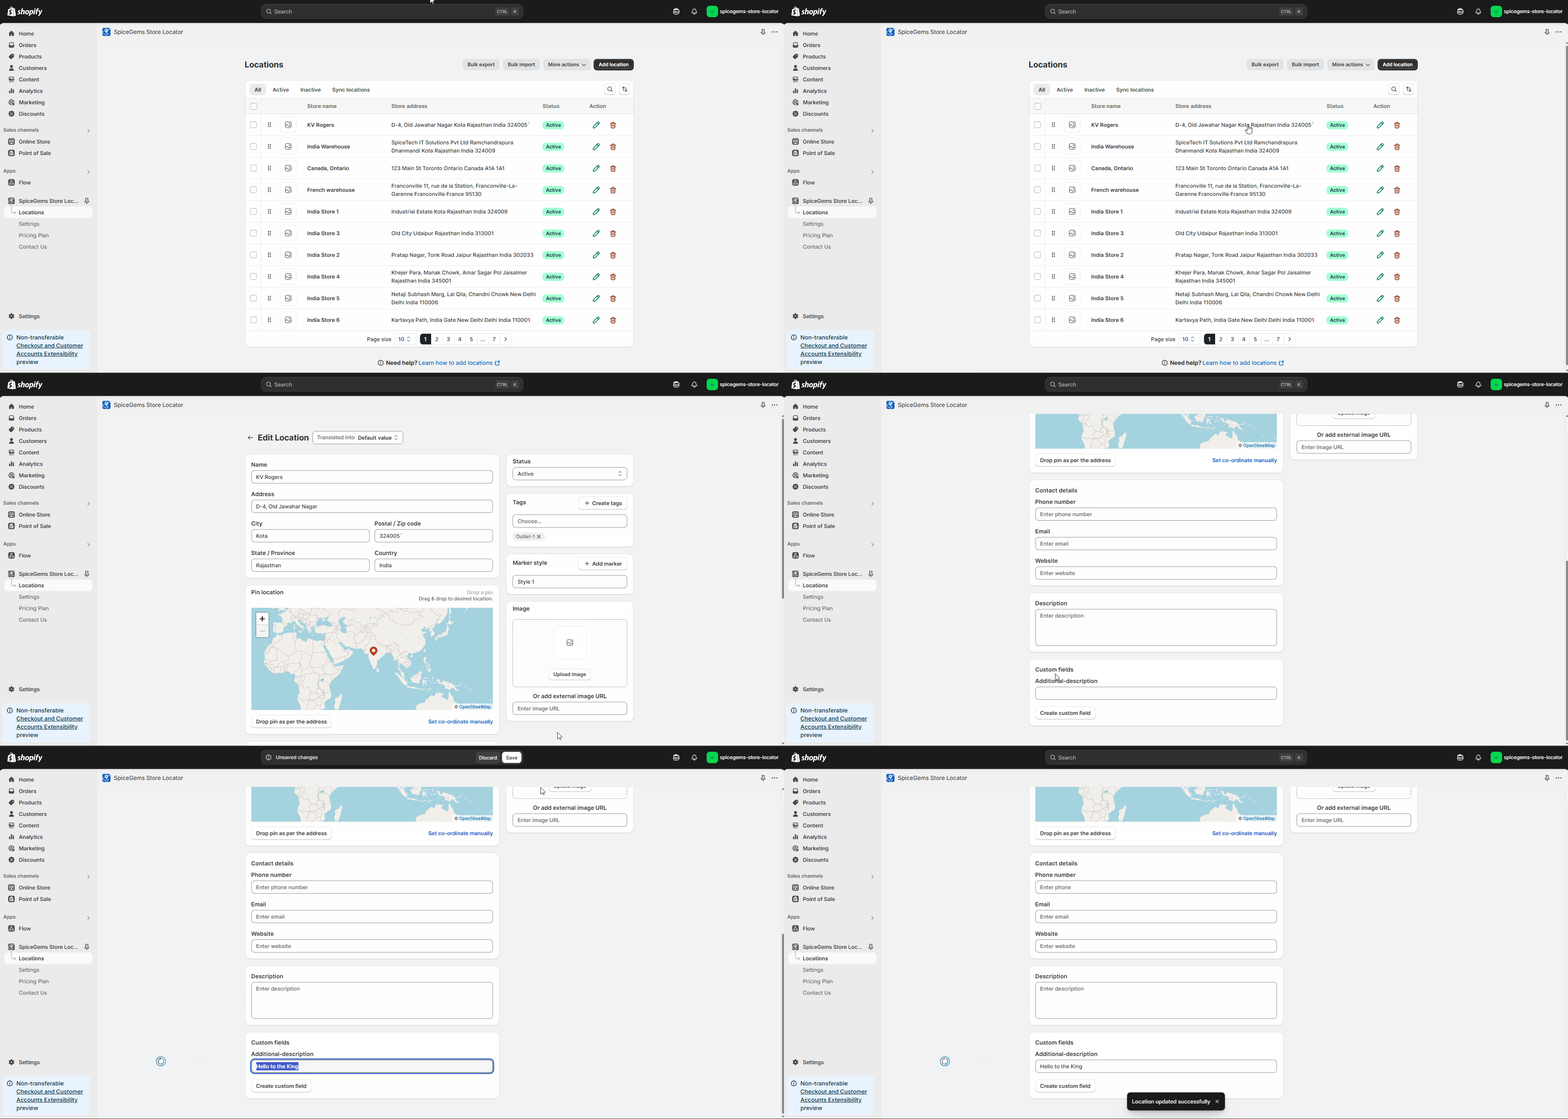
The field is now created in the app. You can check the field in the Location section for adding additional information.
To display the Tag on the Map on the following places, check the links below:
* [**Display Custom Field (information) in Location List**](/esl-easy-store-locator/settings/location-list-tag-and-custom-field.md)
* [**Display Custom Field (information) on Marker**](/esl-easy-store-locator/settings/markers-tag-and-custom-field.md)
Once the Element is added, it will display the information on the marker in the map.